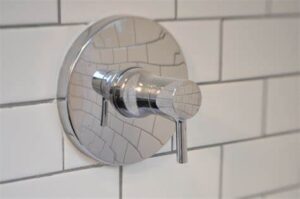
▷5 Tips To Repair Your Shower Valves In San Diego
5 Tips To Repair Your Shower Valves In San Diego
A malfunctioning shower valve can be a real headache, causing water temperature and pressure issues that disrupt your daily routine. Instead of calling a plumber right away, you can save time and money by attempting to repair your shower valves yourself. With a few handy tips and some basic tools, you can tackle this DIY project and have your shower back in working order in no time. In this article, we will discuss five essential tips for repairing your shower valves.
Identify the Problem
Before you begin any repair work, it’s crucial to identify the problem with your shower valve. Common issues include leaks, temperature fluctuations, or difficulty in turning the valve handles. To pinpoint the problem, turn on your shower and note any unusual behavior. A leak may be evident if you see water dripping from the valve or if the wall around it is damp. Temperature fluctuations can be observed by noting whether the water suddenly becomes too hot or too cold during use. Understanding the issue will help you determine the right course of action.
Gather the Necessary Tools
Repairing a shower valve requires a few basic tools. You will need an adjustable wrench, a screwdriver, plumber’s tape, and replacement parts if necessary. Before starting, turn off the water supply to your shower to prevent any accidents or further damage. Once you have the tools ready and the water supply is off, you can proceed with the repair.
Clean and Lubricate the Valve
Many shower valve problems are caused by mineral deposits or debris clogging the valve. To address this issue, start by removing the valve handle using your screwdriver. Once the handle is off, use a brush or cloth to clean the valve stem and the surrounding area. If you notice any buildup, it’s a good idea to soak the components in a mixture of vinegar and water to dissolve mineral deposits. After cleaning, apply plumber’s tape to the valve threads to create a watertight seal. This will help prevent future leaks.
Replace Worn or Damaged Parts
If cleaning and lubricating the valve do not resolve the issue, it may be necessary to replace worn or damaged parts. Common components that may need replacing include the cartridge or O-rings. Consult your shower’s user manual or contact the manufacturer for guidance on locating and replacing these parts. Be sure to turn off the water supply again before removing and replacing any components.
Reassemble and Test
After cleaning and/or replacing parts, reassemble the valve by following the reverse order of disassembly. Make sure all components are securely in place, and use your adjustable wrench to tighten any nuts or bolts as needed. Once everything is back in place, turn on the water supply and test the shower. Check for leaks, temperature consistency, and ease of use. If the issue is resolved, congratulations, you’ve successfully repaired your shower valve!
FAQs
Can I Repair A Leaking Shower Valve Myself, Or Should I Call A Plumber?
You can attempt to repair a leaking shower valve yourself by following the steps mentioned in this article. However, if you’re not comfortable with DIY plumbing or the problem persists after attempting repairs, it’s advisable to call a professional plumber.
What Should I Do If My Shower Valve Is Still Not Working Correctly After Cleaning And Replacing Parts?
If your shower valve continues to malfunction after cleaning and replacing parts, it’s possible that there is a more complex issue at play. In such cases, it’s best to consult a plumber or a professional technician to diagnose and fix the problem.
Can I Use Any Type Of Plumber’s Tape For Sealing The Valve Threads?
It’s recommended to use plumber’s tape specifically designed for plumbing applications. Standard white plumber’s tape, often labeled as Teflon tape, works well for sealing valve threads and preventing leaks.
Call Home Pro Plumbing at (858) 251-7070 for a free consultation if you think there may be a water leak, or use our website to contact us.
Conclusion
Home Pro Plumbing offers tools like subsurface cameras for inspecting pipelines for leaks that you can’t even see. We are experts at fixing hidden plumbing issues and we know where to look for common issues. Even better, we offer yearly safety and plumbing inspections so that we may identify potential problems before they even materialize.
Give Home Pro Plumbing a call right away to learn more about how our experts can help with leak detection in San Diego, CA.
Our Plumbing & Leak Detection Services
Related Posts

▷5 Benefits of Hydro Jet Plumbing: A Comprehensive Guide In San Diego
5 Benefits of Hydro Jet Plumbing: A Comprehensive Guide In San Diego Hydrojet plumbing is a…

▷Essential Tips for Installing a Heat Pump Water Heater In San Diego
Essential Tips for Installing a Heat Pump Water Heater In San Diego Did you know…

